I first tried programming in high school around 2008. I had my own desktop computer and installed Ubuntu to tinker with it. Controlling the machine from the shell felt fresh and fun.

Working via the shell makes automation easy, and I thought mastering Linux commands would let me truly use a computer well. My “programming” began with simple shell scripts strung together.

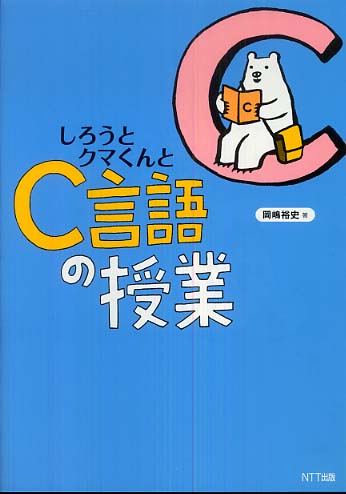
Later I wanted to learn real programming beyond shell scripts. The internet said “learn C first,” so I bought a beginner‑friendly C book titled “Shirouto Kuma‑kun’s C Class” (Japanese).

I “felt like I got it,” but looking back I probably would’ve struggled even with FizzBuzz.

Next I picked up a Windows game‑programming book.

I wrote a simple side‑scrolling action game in C, mostly by copying from the book. It ran, but I can’t say I truly understood it.

Heading into university, I was torn between studying information science or electrical/electronic engineering. I ended up at the University of Electro‑Communications in the Information and Communication Engineering course, where I could learn both.

• • •

In my first year there was a C programming class. I had forgotten much of what I learned in high school, so I started over. There were students who finished assignments incredibly fast—it was eye‑opening. Also, Emacs was required for programming in class, and I became a keen Emacs user.

I wanted to get better and started learning Python. It’s the most popular language now, but back then it wasn’t common in Japan. That rarity actually attracted me.

I remember reading “Minna no Python” as my first Python book and finally being able to write something practical.

During undergrad I didn’t work part‑time or hang out much; I mostly stayed home coding. Living alone, I sometimes wouldn’t see anyone for days and wondered if I was okay with my future.

After getting comfortable with Python, I wanted low‑level knowledge and read books in that area. One that stuck with me was “Hacking: The Art of Exploitation.” Although it’s mainly about security, it finally made C click for me.

I also studied assembly language.

I read many other books, but I wasn’t interested in application development at the time, so not many were practical.

I also didn’t plan to get a programming job—coding was just a hobby—so practicality wasn’t top of mind.

• • •

In my fourth year I joined a Brain‑Computer Interface (BCI) lab and mainly programmed with MATLAB and Octave. For experiments using visually evoked potentials, I wrote programs to present visual stimuli on a PC with PsychoToolbox.

BCI

Python was my strongest language then, so I pushed to build experimental apps in Python. I controlled the EEG device’s DLL via ctypes, and a mistake could blue‑screen the PC—rough times.

Eventually the experiment app settled on MATLAB, and I used Python for analysis and visualization.

Around then, machine learning was gaining attention. I learned with scikit‑learn and, in a seminar, worked through Bishop’s yellow book “Pattern Recognition and Machine Learning.”

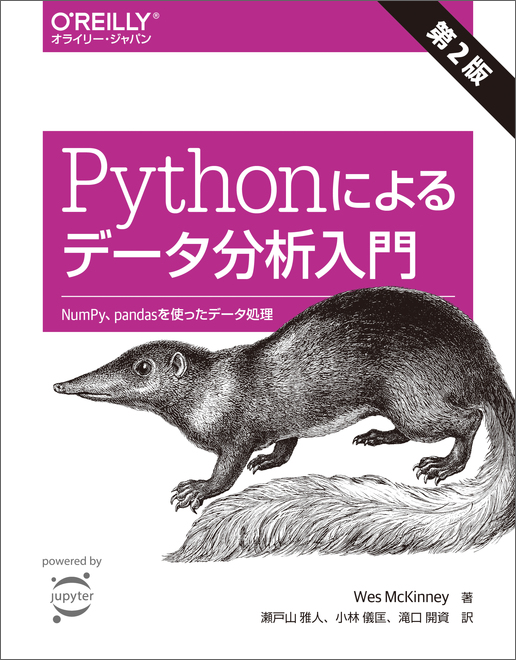
Later I studied data analysis with pandas, which I still use now and then.

• • •

In my first year of the master’s program, I started programming as a job through part‑time work and internships—improving search and building ranking models. Large language models didn’t exist yet, so it was fun trying various feature‑engineering ideas to move metrics.

Doing near‑production work made me realize I’d accumulated a decent skill set.

My research was going okay too, and I enjoyed the deep‑dive nature of research, so I considered a PhD. But internships were very close to real‑world development, and I felt I’d enjoy it as a job.

And that’s how I ended up becoming a professional programmer.

Recently I performed a large refactor in a Go project and wrote down the approach.

Originally, the project used a flat layout like this:

- cmd/api/main.go
- user.go
- user_db.go
- user_db_test.go
- user_handler.go
- user_handler_test.go
- server.go

This worked for a while, but after about a year the number of files grew and overall readability deteriorated.

Keeping everything in one package avoids cyclic imports, but we started to hit symbol name collisions that made certain names unusable.

After considering options, we adopted the layout that places the domain package at the repository root.

What this layout means

By “placing the domain package at the repository root,” I mean creating a domain package at the repo root and organizing implementations into subpackages according to their dependencies. The idea is inspired by Ben Johnson’s article “Standard Package Layout”.

Although the article calls it a “Standard Package Layout,” that name can invite bikeshedding. In this post I’ll simply call it the “root‑domain package layout.”

For example, for a backend API using MySQL, the root domain package might look like this:

- cmd/api/main.go
- mysql/
   - user.go
- http/
   - user_handler.go
   - server.go
- user.go

You don’t have to place Go files directly at the Git repository root. If you prefer not to, or if the repository name doesn’t match the domain name, create a directory for the root domain and put the code there.

If the product is named myapp, the domain package becomes myapp.

- cmd/api/main.go
- myapp/
  - mysql/
    - user.go
  - http/
    - user_handler.go
    - server.go
  - user.go

myapp/user.go defines models used across the codebase:

package myapp

type User struct {
    Name string
    Age int
}

type UserService interface {
    CreateUser(uid string) (*User, error)
    GetUser(uid string) (*User, error)
    UpdateUser(uid string) (*User, error)
    DeleteUser(uid string) error
}

In the mysql package, implement the myapp.UserService interface.

package mysql

type UserService struct {
		db *sqlx.DB
}

func (s *UserService) CreateUser(uid string) (*myapp.User, error) {
	// Concrete implementation using MySQL
}

In the http package, depend on the interface from myapp instead of using mysql.UserService directly.

package http

type UserHandler struct {
    userService myapp.UserService
}

For testing, I generated mocks of the root package via gomock under the mocks directory and had subpackages depend on those mocks when they needed services from the root package.

package myapp

//go:generate mockgen -destination=./mocks/user_service_mock.go -package=mocks . UserService
type UserService interface {
    CreateUser(uid string) (*User, error)
    GetUser(uid string) (*User, error)
    UpdateUser(uid string) (*User, error)
    DeleteUser(uid string) error
}

This way, the mysql package focuses solely on MySQL‑related logic, while the http package avoids a hard dependency on MySQL and can write tests focused on the HTTP server behavior.

- cmd/api/main.go
- myapp/
  - mocks/
    - user_service_mock.go
  - mysql/
    - user.go
    - user_test.go
  - http/
    - user_handler.go
    - user_handler_test.go
  - user.go
  - user_test.go

In the actual project, the structure looked like this:

- cmd/api/main.go
- myapp
  - http (HTTP server)
  - grpc (gRPC server)
  - rdb (MySQL)
  - s3 (Amazon S3)
  - dydb (DynamoDB)
  - iot (AWS IoT)
  - ssm (AWS SSM)
  - fcm (Firebase Cloud Messaging)
  - ... (omitted)

In these subpackages we run tests as close to reality as possible using dockertest and LocalStack when applicable.

Why not name the package domain

It’s perfectly fine to create a domain package instead of placing the domain model at the root:

- cmd/main.go
- domain/
  - user.go
  - user_test.go
- http/
  - user_handler.go
  - user_handler_test.go
- mysql/
  - user.go
  - user_test.go

In that case, code would refer to types as domain.XXX:


func main() {
    user := domain.User{}
}

If placed at the root as myapp, it becomes myapp.XXX:


func main() {
    user := myapp.User{}
}

Using the product name as the package makes it more obvious that these types are used across the whole product.

Comparison with other layouts

Some projects reference specific architectures like Clean Architecture and introduce directories named after layers:

- cmd/main.go
- domain/
- infrastructure/
- presenter/
- repository/
- usecase/

Such naming assumes familiarity with the architectural vocabulary and can be opaque to newcomers.

Similar to why I prefer a product name over domain, I find more direct naming makes code easier to navigate.

Grouping subpackages by dependency keeps placement obvious even without special background knowledge:

- cmd/main.go
- mysql/
- http/
- user.go

Takeaways

Refactoring to place the domain package at the repository root made the project easier to understand and to test. It encourages a design that’s approachable without prior context.

In the previous post we generated OpenAPI with TypeSpec and SWR hooks with Orval.

Here we’ll use Orval’s MSW (Mock Service Worker) generation to make Storybook request mocked APIs.

What is MSW?

MSW is a mocking library for web apps. It intercepts requests (via Service Worker in the browser) and returns mock responses.

Compared to alternatives:

  • Simpler than replacing calls in code; no extra mock plumbing in your code.
  • Simpler setup than running a separate JSON Server mock process.

MSW also works server‑side (Node.js) by intercepting the http module.

Storybook

Storybook lets you develop UI components in isolation.

With Next.js 13, MSW integration with a running app can be tricky—according to this issue, it didn’t work with either Pages or App Router:

This project develops components in Storybook, which is sufficient; below is how to use MSW from Storybook.

Add to Storybook

Use the MSW addon:

MSW Storybook Addon

Install:

npm i msw msw-storybook-addon -D

Create the service worker

Generate the worker script under public/:

npx msw init public/

Update .storybook/preview.ts

Add the addon and pass handlers (created below):

import { initialize, mswLoader } from "msw-storybook-addon";
import { handlers } from "../mocks/handlers";

// Initialize MSW
initialize();

const preview: Preview = {
  parameters: {
    msw: {
      handlers
    }
  },
  loaders: [mswLoader]
};

Generate MSW mocks with Orval

Edit orval.config.ts

Add mock: true so Orval generates mocks along with SWR files:

module.exports = {
  "user-api": {
    input: {
      target: "./openapi.yml",
    },
    output: {
      mode: "split",
      target: "./api/endpoints",
      schemas: './api/models',
      client: "swr",
      mock: true,
    },
    hooks: {
      afterAllFilesWrite: "prettier --write",
    },
  },
};

Generated userAPI.msw.ts

After enabling mocks, run npx orval. You’ll get userAPI.msw.ts with MSW handlers and mock data generation using @faker-js/faker.

Add mocks/handlers.ts

Create mocks and export handlers:

mkdir mocks
cd mocks
import { getUserAPIMock } from "../api/userAPI.msw.ts";

export const handlers = getUserAPIMock();

These handlers are referenced in .storybook/preview.ts. Use the generated SWR hooks in components as usual and MSW will serve responses:

const { data, error, isLoading } = useUsersGetUsers();

Customize mock data

Customize fields via the properties option:

Example to randomize name/email/image URL:

module.exports = {
  "user-api": {
    input: {
      target: "./openapi.yml",
    },
    output: {
      mode: "split",
      target: "./api/endpoints",
      schemas: './api/models',
      client: "swr",
      mock: true,
      override: {
        mock: {
          properties: {
            name: () => faker.name.fullName(),
            email: () => faker.internet.email(),
            '/image/': () => faker.image.url(),
          },
        }
      },
      hooks: {
        afterAllFilesWrite: "prettier --write",
      },
    },
  },
};

Summary

Development flow:

  1. Define the API in TypeSpec (.tsp).
  2. Generate OpenAPI YAML.
  3. Use Orval to generate SWR hooks and MSW mocks.
  4. Develop components in Storybook against the MSW API.

In the previous post I generated an OpenAPI YAML from a TypeSpec API definition.

Now that we have an OpenAPI spec, let’s generate client code and even React hooks for data fetching from the frontend.

With Orval, we can generate hooks for SWR, so let’s try it.

What is SWR?

SWR is a data‑fetching hooks library for React providing caching, error handling, and more.

It makes implementing API requests in the frontend easy. Example from the docs:

function Profile() {
  const { data, error, isLoading } = useSWR('/api/user', fetcher)

  if (error) return <div>failed to load</div>
  if (isLoading) return <div>loading...</div>
  return <div>hello {data.name}!</div>
}

What is Orval?

Orval generates TypeScript clients from OpenAPI (Swagger). Features:

  1. Generate TypeScript models
  2. Generate HTTP calls
  3. Generate MSW (Mock Service Worker) mocks

It can also generate SWR hooks, React Query, Angular clients, etc.

Install

npm i orval -D

Prepare files

We’ll need the TypeSpec tsp file and Orval config.

main.tsp

Define a simple API with TypeSpec:

using TypeSpec.Http;

model User {
	id: string;
	name: string;
	email: string;
}

@route("/users")
interface Users {
	@get
	getUsers(): User[];

	@get
	@route("/{id}")
	getUser(@path id: string): User;
}

Generate openapi.yml as in the previous post:

tsp compile main.tsp --emit @typespec/openapi3

orval.config.ts

We want SWR hooks; docs:

Create orval.config.ts:

module.exports = {
  userstore: {
    input: {
      target: "./openapi.yml",
    },
    output: {
      mode: "split",
      target: "./api/endpoints",
      schemas: "./api/models",
      client: "swr",
    },
  },
};

This places model types under api/models and SWR files under api/endpoints.

Run prettier on generated files

Use afterAllFilesWrite hook:

module.exports = {
  userstore: {
    input: {
      target: "./openapi.yml",
    },
    output: {
      mode: "split",
      target: "./api/endpoints",
      schemas: "./api/models",
      client: "swr",
    },
    hooks: {
      afterAllFilesWrite: "prettier --write",
    },
  },
};

Generate

npx orval

Warnings may appear, but files should be generated under api.

models/user.ts

Contains data models used by the API, reflecting the TypeSpec definitions:

export interface User {
  email: string;
  id: string;
  name: string;
}

endpoints/userAPI.ts

SWR hooks for each API endpoint are generated, e.g.:

export const useUsersGetUsers = (...) => { /* ... */ }
export const useUsersGetUser = (id: string, ...) => { /* ... */ }

Usage:

const { data, error, isLoading } = useUsersGetUsers();

You can pass SWR options; e.g., disable caching with enabled: false:

const { data, error, isLoading } = useUsersGetUsers({
  swr: {
    enabled: false,
  },
});

Set API base URL

By default the generated client requests the same origin as the frontend. To target a different domain, set axios’s baseURL (Orval uses axios under the hood):

axios.defaults.baseURL = '<BACKEND URL>';

See also: Base URL guide.

Summary

Workflow:

  1. Generate OpenAPI from TypeSpec tsp files.
  2. Use Orval to generate SWR hooks for the frontend.

Since Orval can also generate MSW mocks, you can proceed with frontend dev using a TypeSpec definition even before the backend is ready.

This site’s blog is built with Next.js. Articles are written as MDX files, i.e., Markdown plus some React components.

I created a [/posts] “Dev Notes” category to collect development memos and enabled syntax highlighting there. Notes follow.

Install

Use react-syntax-highlighter for highlighting:

Install into a Next.js project:

npm install react-syntax-highlighter --save
npm install @types/react-syntax-highlighter --dev

Setup

When using MDX with Next.js, you can customize elements via mdx-components.tsx.

Add the following:

export function useMDXComponents(components: MDXComponents): MDXComponents {
  return {
    ...components,
    pre: ({ children }) => <>{children}</>, // ②
    code: ({ className, children, ...rest }) => { // ③
      const match = /language-(\w+)/.exec(className || "");
      return match ? (
        <SyntaxHighlighter language={match[1]} style={oneDark}>
          {String(children)}
        </SyntaxHighlighter>
      ) : (
        <code {...rest} className={className}> // ④
          {children}
        </code>
      );
    },
  }
}

This highlights fenced code blocks in Markdown automatically.

Notes

  1. I’m using Prism’s oneDark style.
  2. MDX code blocks render as <pre><code>…</code></pre>, but SyntaxHighlighter generates its own pre, so we strip the outer pre to avoid nesting.
  3. If a language is present on code, render with SyntaxHighlighter.
  4. When no language is specified or for inline code, fall back to a normal code element.

Background

For APIs, I prefer defining them in a DSL and generating code from it. With REST, you can write OpenAPI (Swagger) and generate docs/clients, but writing YAML is often painful.

There are GUI tools to author OpenAPI, but requiring a separate GUI to write and read specs feels wrong—specs should be text, versioned like code.

Code‑first tools that generate OpenAPI from a backend exist, but they tie you to a language/framework. If you’re only on the frontend, it’s not ideal.

Since I already write TypeScript types on the frontend, a TypeScript‑like way to write API specs would be ideal. That’s where TypeSpec fits.

What is TypeSpec?

TypeSpec is a Microsoft DSL for designing and documenting APIs using TypeScript‑like syntax.

Official site: https://typespec.io/

Install and setup

Install globally:

npm install -g @typespec/compiler

Check the version:

tsp --version

Initialize a new project (creates main.tsp, package.json, tspconfig.yaml, etc.):

tsp init

Install dependencies:

tsp install

Basic usage

Create main.tsp. Example from the docs:

using TypeSpec.Http;

model Store {
  name: string;
  address: Address;
}

model Address {
  street: string;
  city: string;
}

@route("/stores")
interface Stores {
  list(@query filter: string): Store[];
  read(@path id: Store): Store;
}

If you’ve written code before, you can read this at a glance. Compared to the equivalent OpenAPI YAML, TypeSpec is far more concise.

Generate OpenAPI

Install the package:

npm install @typespec/openapi3

Compile TypeSpec to generate OpenAPI:

tsp compile main.tsp --emit @typespec/openapi3

You can configure tspconfig.yaml so you don’t pass --emit each time:

emit:
  - "@typespec/openapi3"

Watch for file changes:

tsp compile main.tsp --emit @typespec/openapi3 --watch

By default, tsp-output/@typespec/openapi3/openapi.yaml is created. To output openapi.yml at the project root, add:

options:
  "@typespec/openapi3":
    emitter-output-dir: "{output-dir}"
    output-file: "openapi.yml"

output-dir: "{project-root}"

Syntax

Models

Define data models with model. Defaults and optional properties are TypeScript‑like:

model User {
  id: string;
  name: string = "Anonymous";
  description?: string;
}

Decorators add docs and validation:

model User {
  @doc("User ID")
  @maxLength(50)
  username: string;

  @doc("User email address")
  @pattern("^[a-zA-Z0-9._%+-]+@[a-zA-Z0-9.-]+\\.[a-zA-Z]{2,}$")
  email: string;

  @doc("User age (18+)" )
  @minValue(18)
  age: int32;
}

Use enums:

enum UserRole {
  Admin,
  Editor,
  Viewer
}

model User {
  role: UserRole;
}

Operations

Use op to define endpoints. Example GET to fetch a user:

op getUser(userId: string): User;

Decorate with HTTP metadata:

@get
@route("/users/{userId}")
op getUser(userId: string): User;

Interfaces

Group operations with interface. CRUD for users:

interface Users {
	@get
	@route("/users")
	listUsers(limit?: int32, role?: string): User[];

	@get
	@route("/users/{userId}")
	getUser(userId: string): User;

	@post
	@route("/users")
	createUser(
		user: {
			name: string;
			email: string;
		},
	): User;

	@patch
	@route("/users/{userId}")
	updateUser(
		userId: string,
		user: {
			name?: string;
			email?: string;
		},
	): User;

	@delete
	@route("/users/{userId}")
	deleteUser(userId: string): void;
}

Takeaways

I used TypeSpec on a project to write an API spec and it felt like writing TypeScript. With the VS Code extension you also get static checks, so syntax errors are easy to catch.

Following the “principle of least astonishment,” TypeSpec feels like a low‑surprise way for TypeScript programmers to write API specs. I plan to use it more going forward.

I worked on multiple projects in parallel, so I ended up touching a fairly wide range of technologies. Here’s a rough list from memory.

  • Mobile apps
    • Flutter
    • React Native, Expo
  • Frontend
    • Next.js (TypeScript)
    • Astro
    • Tailwind CSS
  • Backend
    • Go (echo)
    • Python (FastAPI)
    • Ruby (Rails)
  • Embedded
    • PlatformIO (C++)
    • ESP32
  • Cloud services
    • AWS (ECS, IoT Core)
    • GCP (Cloud Run)
    • Firebase (Auth/Firestore)
    • PlanetScale (MySQL)
    • Cloudflare
  • Other
    • Graph DB (Neo4j)
    • gRPC (Go, Flutter)
    • MQTT (ESP32)
    • Terraform
    • Chrome Extension
    • Figma (web design)

In recent years I did a lot of mobile work; lately there’s been more backend too.

The most challenging has been C++ firmware (I’m still doing it). Debugging is tough, root‑causing errors takes time, memory has to be carefully managed, and you can’t always lean on libraries—so things take longer than expected. More practice needed.

I’d mainly used React Native for mobile, but started using Flutter heavily last year. Hard to pick a favorite for cross‑platform apps, but Flutter feels stable and solid.

For backend, there are many choices. When I don’t have a strong reason otherwise, I gravitate to Go because it’s fast in many senses and leaves fewer things to agonize over. A few days ago I built a small personal API and went with Go again.

For my dev environment, I use IntelliJ or CLion (for C++). Most people around me use VS Code now, but JetBrains IDEs still fit me better.

When building a new GitHub Action, repeatedly testing on GitHub is slow. With act you can validate locally to some extent and then run it on GitHub.

nektos/act GitHub Repository

Installation

Requires a Docker environment.

On macOS:

brew install act

If Go is installed (non‑Mac as well):

go install github.com/nektos/act@latest

On Apple Silicon (M1/M2), pass --container-architecture linux/amd64.

You may hit this yarn issue:

Specify a platform with -P/--platform; as in the issue, -P ubuntu-latest=ghcr.io/catthehacker/ubuntu:js-latest allowed yarn to run.

Put these in ~/.actrc so you don’t have to type them every time:

--container-architecture linux/amd64
-P ubuntu-latest=ghcr.io/catthehacker/ubuntu:js-latest

Basic usage

With no args, act runs workflows triggered by push:

act

To trigger a pull_request workflow:

act pull_request

List workflows for an event

Add -l/--list after the event:

act pull_request -l
Stage  Job ID      Job name    Workflow name  Workflow file    Events      
0      helloworld  helloworld  Hello World    helloworld.yaml  pull_request

Run a specific workflow

Use -W/--workflows to point to a file:

act -W .github/workflows/helloworld.yaml pull_request

Simulate merging a Pull Request locally

Create a test workflow that prints “hello world” on merge (.github/workflows/helloworld.yaml):

name: Hello World

on:
  pull_request:
    types: [closed]

jobs:
  hello-world:
    if: github.event.pull_request.merged == true
    runs-on: ubuntu-latest
    steps:
      - run: echo "Hello World!"

Running locally now fails because the event payload is missing:

act -W .github/workflows/helloworld.yaml pull_request
Error:  Error in if-expression: "if: github.event.pull_request.merged == true" (Unable to dereference 'merged' on non-struct 'invalid')

Work around this by providing an event JSON via -e/--eventpath.

Reference: https://github.com/nektos/act/wiki/Beginner's-guide#using-event-file-to-provide-complete-event-payload

cat pull_request.json
{
  "pull_request": {
    "merged": true
  }
}
act -W .github/workflows/helloworld.yaml pull_request -e pull_request.json
[Hello World/hello-world] 🚀  Start image=ghcr.io/catthehacker/ubuntu:js-latest
...
| Hello World!
[Hello World/hello-world]     Success - echo "Hello World!"

If you change merged to false in pull_request.json, it won’t run.

Recently while reading the vector search OSS Qdrant, I learned an approach for efficient top‑k selection and took notes here.

Partial sorting

When building a search response, you often want only the top‑k items (largest values) from an array of length N.

I used to sort the whole array and slice the first k items. In Rust, that might look like:

fn top_k(v: &mut [i32], k: usize) -> &[i32] {
    v.sort_by_key(|&x| std::cmp::Reverse(x));
    &v[0..k]
}

fn main() {
    let mut v = vec![1, 8, 2, 4, 3];
    assert_eq!(top_k(&mut v, 3), vec![8, 4, 3]);
}

Python and Rust use Timsort (Wikipedia), which is O(n) best‑case and O(n log n) on average/worst‑case, so the above is O(n log n).

It’s simple but wasteful when N ≫ k. With N=10,000 and k=100, there should be a more efficient method.

This is where partial sorting (Wikipedia) helps. Of several methods listed there, heap‑based algorithms are often easiest because standard libraries commonly provide BinaryHeap.

We’ll assume we want the top‑k in descending order.

BinaryHeap complexity

Costs for a binary heap:

  • Peek max: O(1)
  • Push: average O(1), worst O(log n)
  • Pop root: average O(log n), worst O(log n)

Consider a max‑heap where the root is the maximum.

Image
Quoted from https://en.wikipedia.org/wiki/Binary_heap

Getting the max is O(1) by looking at the root.

Why is push average O(1)? Roughly half the nodes are leaves; there’s a 50% chance insertion ends at a leaf, 25% one level up, 12.5% two levels up, etc., giving O(1)*0.5 + O(2)*0.25 + O(3)*0.125 + … = O(2).

Removing the root takes O(log n) swaps proportional to tree height.

  1. Argument for O(1) average‑case heap insertion
  2. Sum of the series on WolframAlpha

Keep a size‑k min‑heap

Push until the heap size reaches k; once at k, on each new push, pop the root to keep size k. The heap then contains the top‑k elements.

Complexity: inserting into a size‑k heap is O(log k), repeated n times → O(n log k). This keeps memory bounded at k, which helps when n is huge or data arrives online.

Qdrant uses this approach (implementation).

Build a max‑heap and pop k times

Alternatively, build a max‑heap over all n items, then pop k times to collect the top‑k in order.

This is a straightforward priority‑queue usage and may be easier to implement.

Complexity: heap construction O(n) plus k pops O(k log n), total O(n + k log n). For large n, this can beat the previous method thanks to the log n factor.

Image
k=100, n=100–10000

Other methods

Wikipedia’s Partial sorting lists quickselect+quicksort and mergesort+quicksort hybrids with O(n + k log k), which can be even more efficient.

Another option is bubble sort that stops after reaching the k‑th element, which is O(nk) (Wikipedia).

For reference, here are visualized complexities:

Image
k=100, n=100–10000; O(n + k log n) and O(n + k log k) overlap

Image
k=1000, n=1000–10000; with large k, O(n + k log k) is more efficient

Introduction

This post is for day 16 of the Information Retrieval / Search Technology Advent Calendar 2021. I’ll briefly explain the overall picture of similar image search.

What is similar image search?

Similar image search lets you search with an image as the query and retrieve visually similar images. Unlike conventional text search, which finds documents by text, image similarity search finds targets by visual appearance.

For example, if you’re looking for clothing with a unique pattern, it can be difficult to describe that pattern in words, making text search hard. When appearance matters, image‑based search can be more suitable.

Google Images also supports searching by image, so many readers may have used it before.

Google Images

Google Images

Recap: full‑text search

In full‑text search, we must retrieve all documents matching a text query. A naive scan over all documents becomes slower as the corpus grows.

To avoid this, we build an index in advance—specifically an inverted index— which maps each term to a list of document IDs, analogous to a book’s back‑of‑book index.

For Japanese text, we perform morphological analysis to split text into tokens and remove particles that aren’t useful for search.

Finally, we rank results by similarity using measures that consider term frequency such as tf‑idf. Apache Lucene is a popular Java library that implements these components. For real systems, we typically rely on Solr or Elasticsearch (both built on Lucene) for clustering, performance, and availability.

How similar image search works

Vectorizing images

In image similarity search, we convert images into vectors so we can compute similarity between vectors (e.g., Euclidean distance or cosine similarity).

Once images are vectors, we can compute similarity via vector distances

Once images are vectors, we can compute similarity via vector distances

We assume that similar images map to nearby points in the feature space. How we create these vectors is a central design choice.

Feature extraction

With 8‑bit color, each pixel is represented by (R, G, B) in the range 0–255. We could flatten these values to a long vector, but similarity using raw pixels performs poorly due to sensitivity to position shifts and background noise.

Instead, we extract useful features from the image—this is feature extraction. Today, we typically use convolutional neural networks (CNNs) for feature extraction.

CNNs excel at image recognition. With deep learning, they can recognize images at near‑human accuracy and are robust to small shifts, color, or shape variations within a class.

In many applications we want to search by a region within an image. Using object detection, we first detect regions and categories of objects, then extract features only from relevant regions. For example, for face similarity search, we crop faces and extract features from the face area only.

Extract only the face region from the image

Extract only the face region from the image

To create features suited for similarity, we can use metric learning—more specifically deep metric learning—which trains embeddings so that items of the same class are closer together and different classes are farther apart. Metric learning outputs vectors directly and is effective when there are many classes but few samples per class—exactly the scenario for image search.

Approximate nearest neighbor (ANN)

As with text search, scanning everything and computing similarities at query time does not scale. Practical systems must respond quickly and also search large corpora to provide convincing results.

Thus we use approximate nearest neighbor (ANN) techniques, which trade some accuracy for much better speed. Like inverted indexes for text, ANN builds an index ahead of time.

Representative ANN libraries include Annoy, NMSLIB, Faiss, and NGT. These play a role similar to Lucene in text search.

ANN involves trade‑offs among accuracy, speed, and memory. Choose methods based on data size and latency requirements. For an overview, see Prof. Matsui’s slides “Frontiers of Approximate Nearest Neighbor Search” (Japanese).

Closing

This post outlined how practical similar image search systems work.

As a side note, I previously published a book on similar image search at a tech fair (in Japanese) and plan to release an updated edition in the Izumi Books series. The book walks through implementing an image search system and dives deeper into metric learning and ANN.

Showing 11 - 20 of 28